Thursday, December 19, 2013

Mom's Candied Nuts

WARNING: BEFORE YOU PROCEED IN MAKING THIS RECIPE, PLEASE NOTE THAT THESE NUTS ARE HIGLY ADDICTIVE AND THE ULTIMATE ENEMY OF SKINNY JEANS. YOU MAY ALSO EXPERIENCE WATERING OF THE MOUTH WHEN READING THIS POST. 

Hello! Long time no see! I apologize for the huge gap between this post and my last, I try hard to post every other day but with school, band, and Christmas prep I sometimes don't even have time to check my email!


But let me tell ya, this recipe is well worth the wait!

After you make these once, they will definitely become a Christmas baking tradition in your home forever! My mom makes these wonderful sweet-and-salty nuts almost every Christmas. She always gives them as gifts, if we don't eat them all of course! There has been only one Christmas that she didn't make them, and we missed them so much!  These aren't the usual cinnamon-sugar coated candied nuts you smell all over the mall(which I absolutely love). They are a mix of pecans and walnuts covered in a crunchy, toasted, meringue/marshmallow topping. The salty nuts and the oh-so-sweet, toasty coating are like a match made in heaven! Not only do they taste amazing(and are highly addictive), but the scent of them baking is DEVINE! Don't you know the tempting smell of the cinnamon-sugar nuts that floats throughout the mall during the holidays? These nuts smell just as good or, in my opinion, even better! If I could bottle it up into a perfume bottle and spray it everywhere I would! I can see the bottle now at Bath and Body Works: Mom's Candied Nuts Eau De Perfume. The wonderful smell of butter, sugar, and toasted nuts is the best! To make these even BETTER(I know, how could that be? They're already perfect!), they are soooooo easy to make!

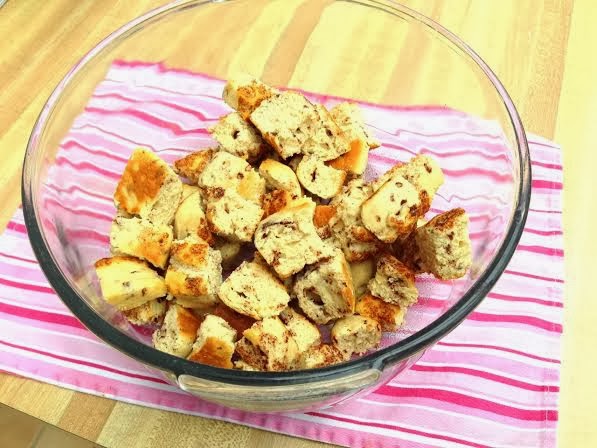
You only need a few simple ingredients: Pecans, Walnuts, Butter, Sugar, Salt, and Egg Whites. First, toast your nuts on a pan lined with foil.


Next, put your egg whites into the bowl of an electric mixer. You will add the sugar gradually, while beating the egg whites on high speed. The mixture should look like this by the time all the sugar is added and you beat it for awhile: 


You will know to stop beating when you turn your mixer off and the lines made from the whisk don't fade. However, it will not form stiff peaks like a true meringue. Once this step is complete, remove the foil from the pan with the nuts on it. By doing this, you won't leave behind any salt used on the nuts. Dump the nuts into the bowl with the "meringue" and gently fold in the nuts. 

(P.S. My mom surprised me with that super cute spatula from Michael's earlier last week. Thanks Mom! :D)

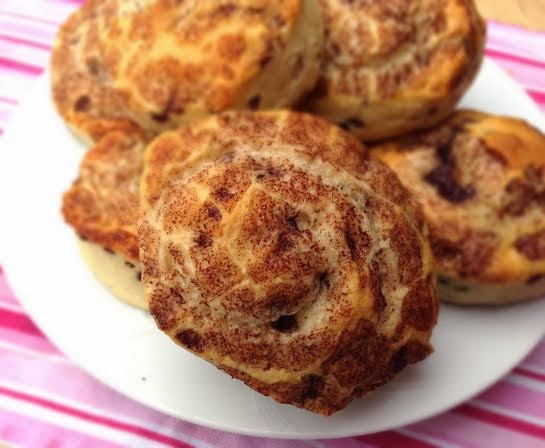
Put 1 stick of unsalted butter on the pan used for the nuts(without the foil) and place it inside the oven until it melts. Remove the pan from the oven and scoop the nuts onto the pan so it forms a heap. It is very important that you heap the nuts onto the pan because they will burn if the are spread out. Bake the nuts for 15 minutes. They will look like this: 

Look how pretty! It's like a toasted marshmallow cloud!

After they bake for 15 minutes, give them a stir and bake them for another 15 minutes. This time, the nuts may be spread out so they get a coating of butter. Take them out of the oven and remove the nuts from the pan with a slotted spoon onto a sheet of foil or parchment paper spread out on your counter or table to leave behind any extra melted butter. Some of the butter may be burned; that's OK! Let the nuts chillax for about one hour on the foil so they crisp up. Then... DIG IN! You won't be able to keep your hands off them! I dare you to try and hold yourself from eating all of them...


Enjoy! 

Love
Teresa 

Ingredients
1 1/2 cup pecans (not salted) 
1 tsp salt
2 cups walnuts 
2 egg whites 
1 cup granulated sugar 
1/2 cup unsalted butter

Yields: about 8 cups 

Preheat oven to 325 degrees. 

Toast The Nuts: Spread the nuts onto a foil-lined baking sheet and sprinkle them with the salt. Toast them in the oven for about 5 minutes, stirring them frequently so they don't burn. Remove them from the oven and set aside. 

Make The Coating: Add the egg whites into a bowl of an electric mixer. Beat the egg whites on high speed, very gradually adding in the granulated sugar. Beat the egg whites and sugar until the lines left from the beater(s) do not fade. 

Coat The Nuts: Remove the foil with the toasted nuts from the baking sheet and dump the nuts from the foil into the meringue mixture. Fold the nuts into the meringue mixture until they are all coated

Melt The Butter: Place the butter in the center of the same baking sheet used for toasting the nuts, this time not covered with foil. Put the tray into the oven and allow the butter to melt. Periodically check on the butter so it does not burn. Once the butter is melted, remove the tray from the oven. 

Bake the Nuts: 
Scoop the coated nuts onto the baking sheet with the melted butter. Make sure they are in a tall heap so they don't burn. Bake the nuts for 15 minutes. Stir the nuts around in the pan to coat them with butter. This time, they may be more spread out on the baking sheet. If the butter looks like it is burning, don't worry! Bake the nuts for an additional 15 minutes after stirring them in the pan and remove them from the oven. Spread a sheet of foil or parchment paper onto a countertop or table. Remove the baked nuts from the baking pan with a slotted spoon onto the foil or parchment paper. Let the nuts cool for about an hour until the become crisp. Store the cooled nuts in an airtight container. 

Recipe From: My Mom
*Please do not take this recipe or photos from my blog and use them as your own. If you do wish to post my recipe on your blog, please ask for permission by emailing me. Thank you. 

Before finishing this post, I would like to send out a special thank you to my Mom! Thanks so much for allowing me to post your beloved candied nut recipes on my blog! You are the best mom and blog supporter a girl could ever ask for! I love you! 


Wednesday, December 11, 2013

Skinny-licious Blueberry Muffins!

Hello everyone! Personally, I don't know anyone who doesn't love a good old blueberry muffin.

 Especially one with a red polkadot liner :)

If I walked into a bakery and had a choice between a chocolate or blueberry muffin, I would definitely go for the blueberry! I know, I know. It may sound insane that I would choose blueberry over chocolate. But who could pass up a cupcake-like muffin bursting bright, juicy, blueberries?! I can't. However, I try to stay away from blueberry muffins despite my love for them. They are usually very calorie and fat laden, which is fine once and while. But why eat something unhealthy when you can make a healthier(and very tasty) version of it yourself? Once you make these blueberry muffins, you will never guess that they are healthier than normal blueberry muffins. They are fluffy, moist, bursting with blueberries, and have a super high muffin top! Which, if I do say so myself, is the best part of a muffin! In this recipe, you use low-fat sour cream to replace a good bit of the butter; there is only a 1/2 stick of butter in the whole recipe! Trust me, replacing some butter with sour cream does save a TON of calories, but does not sacrifice any flavor whatsoever. I really don't believe in making healthy recipes with unfamiliar, hard-to-find, expensive ingredients. I mean, who has protein powder in their cabinet all the time? I sure don't. Who wants to buy a whole package of expensive artificial sweeteners if you are only going to use it once or twice? Not me, especially because artificial sweeteners are worse for you than regular sugar. The ingredients for these wonderful muffins are super simple, and you probably have most of them lying around: butter, sugar, eggs, vanilla, sour cream, flour, baking powder and soda, salt, and blueberries. What makes this recipe even better is that if you don't have blueberries, you can put whatever you want in them! Cranberries, raspberries, apples, nuts, a dusting of cinnamon-sugar, chocolate chips, or maybe even stuffed with peanut butter ;) This recipe is a perfect, skinnier, blank canvas for your favorite muffin flavors! So go ahead, indulge in a blueberry muffin and feel better about eating it too! 

Enjoy! 

Love
Teresa 

Ingredients
1/4 cup(half stick) unsalted butter, softened to room temperature 
1 cup granulated sugar(plus some extra for sprinkling on top of the muffins) 
2 eggs, room temperature 
1 cup reduced-fat sour cream( I used Daisy Light)
2 tbsp water 
1 tsp vanilla 
1 3/4 cup plus 1 tbsp all-purpose flour 
2 1/2 tsp baking powder 
1/2 tsp. baking soda 
1/2 tsp salt
1 cup fresh blueberries 

Preheat oven to 400 degrees. Line a muffin tin with cupcake liners and spray them with non-stick cooking spray. Spraying the cupcake liners is necessary. Your muffins will stick to the liners and tear if you do not spray them. 

Cream butter and sugar on medium-high speed for about 3 minutes until light and fluffy. Beat in the eggs until completely combined, scraping down the sides of the bowl as needed. Beat in the sour cream, vanilla, and water. 

In a small bowl, toss the blueberries and flour together until the blueberries are coated. This prevents the blueberries from sinking to the bottom of the muffin when the muffins are baking.

In a large bowl, gently whisk the flour, baking powder, baking soda, and salt together. Pour the wet ingredients into the dry. Gently stir the mixture together until just combined.  Gently fold in the blueberries. The batter will be slightly lumpy, and that's OK

Spoon the batter into the muffin cups until they are almost full. Sprinkle some of the extra sugar on top of the batter. 

Bake the muffins for 15 minutes or until a toothpick inserted in the center comes out clean. Once baked, remove the muffins from the pan and let them cool completely on a wire rack. 

*Please do not take this recipe or photos from my blog and use them as your own. If you do wish to post my recipe on your blog, please ask for permission by emailing me. Thank you. 


Sunday, December 8, 2013

Not Just Any Chocolate Chip Cookies

Hi everyone! I hope you had an awesome weekend :). As a part of my blog, I want to share with you some of my favorite "basic" recipes. These are the recipes that everyone needs to have. Sugar cookies, brownies, vanilla/chocolate cake, frosting, aaaaaand (drumrollllllll) chocolate chip cookies!


However, I would not exactly call these cookies "basic". As much as I love chocolate chip cookies, they have to be right in order for me to eat them. I am extremely picky-choosey about the chocolate chip cookies that I eat; they have to be soft, chewy, flavorful, and homemade. Homemade cookies are so much more special than the store-bought variety. For one thing, you don't always get them. You can buy store bought cookies any day, but homemade only come once and a while; they are exclusive! And, you can eat them hot out of the oven! Which is the best ;) 


These particular cookies are moist, thick, and oh so soft! Hard cookies are NOT ALLOWED in my kitchen. Unless they are my mom's amazing biscotti, of course. I promise, these cookies will definitely be a staple recipe once you give them a try. They get their awesomeness from these components: shortening, brown sugar, an extra egg yolk, cornstarch, and chilling. I know, I know, you may be shaking your head at the fact that there is shortening in this recipe. You're probably thinking that these cookies lose flavor because there is less butter. But, my friends, they don't! See, I use half butter and half shortening in my chocolate chip cookies. You get all the butter flavor, but none of the spread that makes cookies crisp and flat. Using shortening reduces their spread in the oven, therefore, making thicker and puffier cookies. This recipe calls for more brown sugar than white sugar. Brown sugar provides flavor and moistness because it contains molasses, rather than white sugar which does not. In addition to a whole egg, you will need an extra egg yolk.  Adding an egg yolk adds moisture and richness without making the cookies "cake-y". Now, here is the ingredient that you may not always see in chocolate chip cookie recipes: cornstarch. There is only a little bit of it in the cookie dough, but boy does it make a big difference! I would't make my chocolate chip cookies without them, and I bet you won't either once you try these! Cornstarch keeps your cookies soft and thick, not flat and crunchy. The last thing that allows these chocolate chip cookies to be so wonderful is chilling the dough. We all like to chill-ax sometimes, don't we? Well, it turns out that your cookie dough does too! I personally like to chill my dough overnight, but an hour and a half will be sufficient enough. Chilling the dough, along with corn starch and shortening, produces thick cookies. The colder the dough is, the less the cookies will spread. Even though the cookies have to chill for awhile, the only bake for 8 minutes! 9 at the max. They will look very under baked. However, they won't be! Once you remove them from the oven, you let them sit on the cookie sheet for 3 minutes. The cookies will continue to bake during this time, allowing your cookies to be soft but not raw(even though I have no problem with eating raw cookie dough ;)). Keep in mind that even though these cookies are anything but "basic", the dough itself makes for a great blank canvas! You can add so many different things to this wonderful dough: nuts, white chocolate chips, raisins, chopped candy bars, M&M's, anything your cookie-craving heart desires! 


Now, go buy some chocolate chips and get baking! Everyone needs a good old chocolate chip cookie once and a while :)

Enjoy! 

Love,
Teresa 

Ingredients
3/4 cup light brown sugar 
1/4 cup granulated sugar 
1 1/2 tsp vanilla extract 
1 egg and 1 egg yolk, room temperature 
1/3 cup unsalted butter, softened 
1/3 cup shortening(Crisco), softened 
1 1/2 cup all purpose flour 
2 tsp. cornstarch 
1/2 tsp. salt
1/2 tsp. baking powder 
1 cup + 3 tbsp semi-sweet chocolate chips 

Yields: 22-24 cookies

Preheat oven to 375 degrees. Line a baking sheet with a silicon baking mat or parchment paper. 

Cream butter, shortening, and both sugars together until light and fluffy. Beat in egg, egg yolk, and vanilla until completely combined. Stir in the flour, cornstarch, salt, baking powder, until just combined. Fold in the chocolate chips. 

Chill the dough for at least an hour and a half. 

Drop the dough by rounded tablespoons onto the lined baking sheet, about 2 inches apart. Bake for 8-9 minutes until the bottom edges of the cookies are golden. Remove them from the oven and allow them to rest on the baking sheet for 3 minutes. Remove the cookies from the baking sheet and allow them to cool completely on a wire rack. Store the cookies in an air-tight container to keep them soft. 

Recipe Adapted From: Betty Crocker's Baking Classics  
*Please do not take this recipe or photos from my blog and use them as your own. If you do wish to post my recipe on your blog, please ask for permission by emailing me. Thank you. 


Thursday, December 5, 2013

Gingerbread Cookie Dough Stuffed Buttermint Rice Krispie Treats

Hello my fellow Christmas lovers! Today I have a recipe that should definitely added to your Christmas baking list! It combines two amazing holiday flavors into one Rice Krispie treat: gingerbread and mint


I must admit, I like cookie dough better than the actual cookie sometimes. Especially chocolate chip cookie dough! That is why my mom(Hi mom!) bought me this wonderful cookbook: 


I cannot describe how much I love this cookbook, there are so many awesome cookie dough recipes! It is a cookie dough bible!!! As I was flipping through the pages of cookie dough awesomeness, these two recipes sparked my baking imagination: 

Cookie Dough Stuffed Rice Krispie Treats

Gingerbread Cookie Dough Bark

I instantly thought to combine the two! Instead of chocolate chip cookie dough, I used gingerbread cookie dough and instead of candy canes, I used Buttermints. Since the bark has white chocolate, I thought the Buttermints would be perfect; the mints have a slight white chocolate flavor. Plus they have pretty Christmas sprinkles on them! And I lovvvvvveee sprinkles! They're like glitter for food! 

To make these festive treats, begin by making the cookie dough first. It's very important to make the cookie dough first because the Rice Krispie treat mixture becomes too firm to press into the pan if you let it sit while you make the cookie dough. Beat the butter, brown sugar, and molasses together for 2-3 minutes until it's light and fluffy. I prefer to use mild molasses; it provides just enough molasses flavor without being overpowering. Next beat in your flour, salt, and spices. Ta-da! Delicious cookie dough is done. Set that aside and try to keep your fingers out of the bowl until you've finished making the Rice Krispie treats ;) 

For the Rice Krispie treats, I make them in a slightly different way: I make them in the microwave! It is SO much easier than using a skillet! Combine your marshmallows and butter into a microwave-safe bowl. Microwave the butter and marshmallows for 2 minutes and give it stir. Stick them back into the microwave for 1 more minute and give it a stir again. Stir in some vanilla until it is completely incorporated, and mix in the Rice Krispie cereal. 

Look at those melty, puffy marshmallows!!! 

After all of your Rice Krispie treat mixture is combined, press 1/2 of it into a greased 7"x11" baking pan. I prefer this size because it makes the Rice Krispie Treats slightly thicker and higher, just how I like 'em! Now, grab your cookie dough(if you haven't already eaten it) and press it on top of the Rice Krispie treat layer. Press on the remaining Rice Krispie treat mixture and Buttermints on top of the cookie dough. Cut into the Rice Krispie treats and dig in! And if you plan on making these for Christmas, try to save some for Santa! I know it will be hard not to eat them all, but I'm sure he would really appreciate them ;) 


Enjoy! 

Love
Teresa  

Ingredients
2 tbsp. unsalted butter, softened 
6 tbsp. mild mollasses 
6 tbsp. brown sugar 
1/4 tsp. allspice 
1/4 tsp. cinnamon
1/2 tsp. ground ginger 
1/4 tsp. salt 
1 cup and 2 tbsp. all purpose flour 
1 10 oz. bag mini marshmallows 
2 tbsp. unsalted butter 
6 cups Rice Krispie cereal 
1 tsp. vanilla extract
1/2 cup Buttermints

Yields: 24 bars

Grease a 7"x11" baking pan with non-stick cooking spray. 

In a large bowl, beat together the molasses, brown sugar, and butter for 2-3 minutes until light and fluffy. Beat in the salt and spices. Slowly mix in the flour a 1/4 cup at a time until completely combined.  Set this aside. 

In a microwave-safe bowl, combine the butter and marshmallows. Microwave this for 2 minutes. Remove it from the oven and give it stir. Put it back in the microwave for 1 more minute and stir again. Stir in the vanilla and then Rice Krispie cereal. 

Press half the Rice Krispie mixture into the bottom of the baking pan, making sure it reaches the sides. Press the cookie dough on top of that and the other half of the Rice Krispie mixture on top of the cookie dough. Press the Buttermints on top of the Rice Krispe treats. Once cooled, cut into bars. 

Recipe Adapted From: The Cookie Dough Lover's Cookbook, by Lindsay Landis 
*Please do not take this recipe or photos from my blog and use them as your own. If you do wish to post my recipe on your blog, please ask for permission by emailing me. Thank you. 


Monday, December 2, 2013

Cinnamon Roll Bread Pudding.

Happy Monday everyone! The recipe I will be sharing with you today features these little guys:


I love Pillsbury Cinnamon Rolls, I have been eating them for as long as I can remember! My mom always makes them on Saturday mornings. The combo of melty cream cheese icing(that I have eaten straight out of the container) and sweet cinnamon is just so irresistible!


I mean just look at these! What's not to love?! 

As delicious as these are alone, I decided to change it up a bit: I made them into bread pudding! It's bread pudding, but with a twist! Haha... I'm the only one laughing, huh? 

Well then, lets discuss how this recipe came to be and how to make it. Not too long ago, MeMa(Hi MeMa!) made Panettone bread pudding.  If you have never eaten Panettone, it's an extremely flavorful Italian sweet bread that is usually eaten around Christmas. The bread pudding she made with it was SO GOOD. Needless to say, I asked her for the recipe. It only requires a few ingredients: bread, eggs, milk, sugar, and vanilla. It is such a blank canvas, you can add any type of bread you like! Having this recipe as a blank canvas was perfect; my cousin Joey suggested that I put a bread pudding recipe up here and MeMa's recipe was the perfect recipe to build off of. So after much brain storming, I decided to use cinnamon rolls instead of Panettone! And I am so glad I did, because the results were phenomenal. To make it, begin by pop open 2 cinnamon roll cans and and placing the cinnamon rolls on a parchment or silicon mat-lined baking sheet and bake them up. SAVE THE FROSTING FOR LATER.


Once the cinnamon rolls are done baking, allow them to cool slightly on the pan. Cut up the cinnamon rolls into cubes, enough to yield 6 heaping cups of cubes(you will have extra rolls). Transfer the cubes into a large bowl. 


In a small bowl, whisk together milk, eggs, sugar, and vanilla until it looks smooth. Pour the liquid into the bowl with the cubed cinnamon rolls and stir everything together so the cinnamon rolls are soaked. Transfer this mixture into an 8"x8" baking pan sprayed with non-stick spray. 


Now, here is the strange part: put the 8"x8" pan into a 9"x13" pan. Fill the 9"x13" with boiling water, but NOT inside the 8"x8". Surrounding the 8"x8" pan with boiling water allows the custard in the bread pudding to puff up and cook nicely from the steam that is produced. I strongly suggest putting the  rectangular pan with the square pan inside of it in the oven before filling the 9"x13" with the boiling water. This way, you don't have to carry a heavy pan filled with boiling water that's splashing around. Once you have completed these steps, close the oven and let the bread pudding do its magic! 
While you're waiting, you can snack on some extra cinnamon rolls ;) 


When your bread pudding is done, take it out of the oven and drizzle on that delicious frosting that you saved! 


I'm a heavy drizzler :P

Once your bread pudding is frosted, dig in! You don't have to wait for it to cool! 


Enjoy!

Love,
Teresa


Ingredients
*2 cans Pillsbury Cinnamon Rolls 
3 eggs 
2 cups 2% milk  
1/4 cup granulated sugar 
1 tsp. vanilla extract 
Boiling water

Yields: 9 generous servings 

Preheat the oven to 400. Line two baking sheets with parchment paper or a silicon baking mat. Spray an 8"x8" square baking pan with non-stick cooking spray. Boil enough water to fill a 9"x13" baking pan half way up. I boiled the water in a tea kettle so it would be easy to pour. 

Pop open the cinnamon roll cans and arrange 8 cinnamons rolls on each baking sheet. Set the frosting aside for later. Bake the rolls for 8-10 minutes until they are golden brown around the edges. Allow the rolls to cool on the baking sheets while combining the other ingredients. 

In a small bowl, whisk the eggs, milk, sugar, and vanilla together until smooth. Set aside. 

Cut just enough cinnamon rolls into small/medium sized cubes to equal 6 heaping cups of cubes. I measured it out as I cut them so I wouldn't waste any extra rolls that didn't need cut. I cut about 9 cinnamon rolls. Put the cubes into a large bowl. Add the egg mixture to the cinnamon roll cubes and gently stir them together to soak the cubes. Transfer this mixture into the square baking pan. Place this pan inside a 9"x13" baking pan. Cover the 8"x8" baking pan loosely with aluminum foil. 

Open your oven and put the 9"x13" baking pan with the 8"x8" baking pan inside of it on the center rack. Pour the boiling water inside the 9"x13" baking pan so it surrounds the 8"x8" baking pan half way up. DO NOT LET ANY WATER GET INSIDE THE 8"x8" BAKING PAN. 

Bake the bread pudding for 40 minutes. Once removed from the oven, drizzle the reserved frosting on top of the bread pudding. Cut into squares and serve either warm or chilled. Store in the refrigerator. 

*You will have extra cinnamon rolls and frosting. I put the cinnamon rolls in a Zip-Lock bag to save for breakfast and stored the extra frosting in the refrigerator. 


Recipe Adapted From: MeMa's Bread Pudding Recipe 
*Please do not take this recipe or photos from my blog and use them as your own. If you do wish to post my recipe on your blog, please ask for permission by emailing me. Thank you.